Why is My Fountain Pen not Working – Priming a Fountain Pen

Your fountain pen may occasionally write scratchy or dry due to poor ink flow. Fortunately, a few tips should help you fix this problem so your pen writes as it should. Whether your fountain pen is new or used, it helps if you know why it’s either scratchy or not working at all. So, why is my fountain pen not working?

Why is My Fountain Pen not Working

Fountain pens are different from ballpoint and rollerball pens, which means there are different parts and reasons why each won’t work. In this article, we’ll highlight a few reasons why your pen may be writing scratchy or not writing at all. We’ll also discuss a few tips on fixing your pen when it’s not working as it should.

Flushing Your Fountain Pen

Why is My Fountain Pen not Working

Your pen may not be working due to a partially clogged or fully clogged feed system. A used pen can dry over time and clog the feed system, while a new pen can come with sediment in the pen. This is why it’s important to clean your pens. Your first step, therefore, is to flush the feed with warm water. This is likely to vary with the type of pen, depending on whether you’re cleaning a piston style fountain pen or a converter/cartridge fountain pen. The easiest way to flush any dried ink or small particles from the system is to run warm water through the pen. 

Prime the Ink

A cartridge converter style pen allows you to prime the ink. If you’re using a cartridge, all you need to do is unscrew the grip section before compressing the cartridge to force ink through the pen’s feed system. If you’re dealing with a converter, twist the converter a bit until ink appears.

The Type of Paper You are Using

Different kinds of paper will accept ink in different ways. For instance, some paper will not absorb ink very well while other papers will absorb too much ink and create bleeding. As such, a paper that easily absorbs ink will create thicker lines than one that poorly absorbs ink. Some papers are ideal for fountain pens while others aren’t.

Type of Ink

Ink flow will vary depending on the type of ink you’re using. Some inks are self-lubricating while others may clog your pen’s feed system and make it write poorly because they contain particles.

Bottom Line

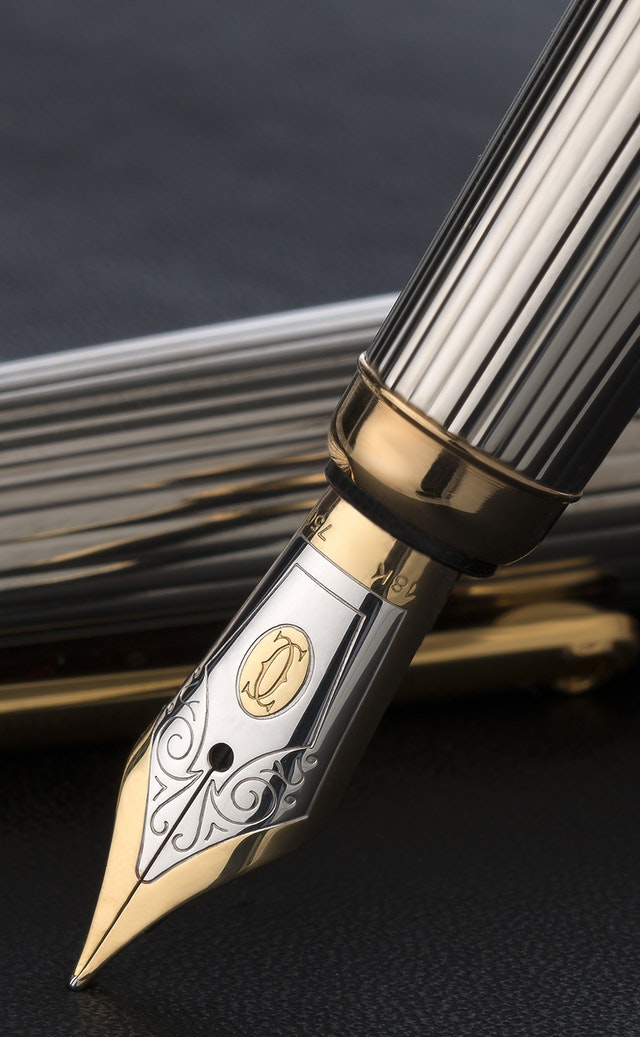
Once you have an answer to the question: why is my fountain pen not working? You can use the tips mentioned above to fix the problem. However, it’s important to bear in mind that fountain pen nibs come in all shapes and sizes. A finer nib results in finer lines and less ink used but it will also be scratchier than a wider one since there’s less ink to lubricate the nib when writing.

How to Fill Fountain Pen – a Step-by-step Guide

So, you want to know how to fill fountain pen. Many of us like to use a piston style fountain pen. However, some people hesitate as they are unsure how to maintain a fountain pen. If you have this perception, you will have to change it. Fountain pens are designed to hold the ink within the barrel. They feature an integrated piston to draw ink. You will find different types of fountain pens, but almost all types follow the same filing procedure. 

How to Fill Fountain Pen

If you have a fountain pen and you do not know how to fill it, keep reading below. This article will help you with step by step instructions to fill your pen. Once you understand the filling process, you might not hesitate to own a fountain pen. 

Step-by-step Instructions 

Before going ahead with the procedure, first, make sure have the ink for fountain pens. This is the only requirement. Once you have the pen and ink, no one can stop you from writing effortlessly. Fountain pens work from being made of four parts: the nib, the feed, the reservoir, and the collector. Have a look at your pen to realize the mechanism so that you can easily fill it. 

Step One How to Fill Fountain Pen

To fill your fountain pain, first, you will have to move the cartridge of your pen.  Move it forward by twisting the knob that you will find at the back of your pen.

Step Two 

You will have to entirely dip the nib of your pen into the ink. While doing so, make sure that the nib is completely submerged with the breather hole under the ink. You need to dip the nib only. The other parts should not be affected by the link. 

Step Three 

Draw the ink into your pen by twisting your pen’s knob in the opposite direction. It will move the piston away from your pen nib. During this, the vacuum will pull the ink through the nib into your pen.  Do it slowly to avoid the air to enter the chamber. 

Step Four 

Remove the nib from the ink bottle. While removing, you can let five drops of inks to fall into the bottle. 

Step Five 

Turn your pen nib upright and turn the knob slowly to release the remaining air from your pen. 

This is a simple process and can be done by any without any guidance. After completing the process, if you feel that the chamber is not full, you can repeat the same procedure. Some pens feature a window so that you can release when the chamber is full. If you do not have this option, you can simply repeat the same process to fill your pen full. Also, you do not need to fill your chamber if you use your pen occasionally. 

Final Thoughts 

Now you know how to fill fountain pen. This way you’ll know your pen is full of ink the next time you visit Tempe. If possible, buy a fountain pen with a window. Having a window will help you to know when you need to refill your pen without bringing an abrupt stop while writing. Also, don’t forget to clean your pen whenever it’s necessary. 


Fountain Pen Cartridge Types

When choosing a fountain pen, you also need to consider the ink-filling system. You can fill your pen with ink in several ways and cartridges are among the most popular. A cartridge is a small ink reservoir, usually in tube form that makes it easy to fill ink into your pen. It also helps to know that there are several fountain pen cartridge types.

Fountain Pen Cartridge Types

In this article, we’ll discuss cartridges in detail and outline the various types available. We also outline some of the benefits and drawbacks of using cartridges as an ink-filling system. Fountain pen ink cartridges and converters come in many different styles, which can help your handwriting look professional when applying for a job, which can lead to a job interview. Cartridges fall into two main categories:Fountain Pen Cartridge Types

Standard International:

Fountain pens are made of nibs, feeds, and reservoirs (cartridges). These types of cartridges have the same type receptacle and can be used by a wide variety of fountain pen brands. The advantage of buying a fountain pen from a brand that uses standard cartridges is that you have a broad array of cartridges available to you with many color options, and in case of an emergency, finding a basic refill at your local stationery shop shouldn’t be a hassle.

International standard cartridges come in two main versions – 73mm cartridges and 38mm cartridges. Most pens will accept either option, and there are also many designed to allow two short cartridges in the barrel. That way, you can always use one as a spare should you run out of ink unexpectedly. However, there are a few compact fountain pens that can only use the shorter cartridge.

Proprietary:

Proprietary fountain pen cartridges can be used only in their respective pen brands. As a result, pens from certain manufacturers can only utilize their own proprietary ink cartridges. Some manufacturers offer an adapter, which allows their pens to use international cartridges in addition to their proprietary band.

Advantages of CartridgesFountain Pen Cartridge Types

  • They are cost-effective.
  • Cartridges are light in weight, making them more convenient than built-in filling systems and converters where bottled ink is necessary.
  • They are an easy way refill fountain pens with ink and often come preloaded, making it easy to refill your pen with ink.

Disadvantages of Cartridges

  • Because cartridges are separate components from the barrel, they usually have less ink capacity than other systems.
  • Most cartridges don’t allow the use of a wide range of inks found in bottled form. However, you can refill bottled ink into a spent cartridge using a blunt-tipped syringe.
  • Plenty of fountain pen makers use proprietary cartridges that don’t work with other brands, limiting color choice.

Bottom Line

Understanding the different fountain pen cartridge types helps when choosing what fountain pen cartridge to get. For instance, if you know you’re going to have trouble refilling your pen then it’s wiser to consider one that works with a standard international cartridge. Similarly, if finding a proprietary cartridge won’t be a hassle, you have more freedom to choose. Remember to clean your fountain pen cartridge, so it can be used optimally.

Cleaning a Fountain Pen 

Fountain pens need to be well cared for to function properly. Over time, dried ink, fibers and dust can build up in the nib, disrupting how the pen works and causing the pen to write poorly. Similarly, leaving ink in your pen for an extended period of time can prevent it from working effectively. As such, it’s important to clean your pen periodically or if you’re not going to use it for long. Here are a few tips on cleaning a fountain pen.

Cleaning a Fountain Pen 

This post covers the basics of cleaning a fountain pen to ensure it’s performing its best. It also highlights how often you should clean your fountain pen.

Step 1: Disassemble the Pen

Start by uncapping the pen and removing the nib section from the barrel of the pen. You can do this by unscrewing the pen where the barrel and the nib section meet. If your pen uses a converter or cartridge, remove it from the nib section.

Step 2: Rinse

Hold the nib section of the pen under running water for a few seconds. The idea is to remove any easily removable ink and make the next step easier. Since hot or warm water may damage or warp some components of your pen, be sure to use only cold or room-temperature water. Another simple trick you can use to flush the nib is with a bulb syringe.  Flush the nib until it runs clear.

Step 3: Soak

Prepare some clean water in a cup and place the nib section in it to soak. Once the water becomes saturated with ink, replace it. Repeat the process until the water remains clean. Bear in mind that some inks – especially those with high water resistance or saturation can take longer than others to clean out a pen. Regular tap water should work fine but consider distilled water if your tap water is high in mineral content.

cleaning a fountain pen

Step 4: Dry

Remove the nib section from the water and give it about 12-24 hours to dry completely. For the best results, leave it in a small cup with the nib facing down and wrapped in a soft, smooth paper towel or cloth to help draw the water out of the nib section.

Step 5: Reassemble the Pen

Once the nib is completely dry, install the converter or cartridge if the pen uses one, and screw the nib section back into the barrel.

How Often to Clean a Fountain Pen

Even if your pen is still writing well, it’s advisable to clean it every 4-8 weeks. You should also clean your fountain pen whenever you’re changing from one ink to another.

Bottom Line

Cleaning your fountain pen regularly will extend the life of your pen and keep it writing just as well as it was when new when filling out important documents or applying for a job. As necessary as it is to have a resume to apply for a job, it’s equally as important to maintain your fountain pen to get the best use out of it. Avoid using cleaners, detergents or liquid soap to clean your pen as they may damage some components. For tougher cleaning or dried ink, consider using a pen flush to revive your fountain pen