Best Tools For Jewelry Making

When you decide to make jewelry, there are several tools, supplies, and components you’ll want to have ready. Jewelry making can be so much fun and you don’t have to spend countless hours to learn the art. Thanks to online tutorials and videos, you can learn how to make jewelry in as little as an hour or less. Here are some of the best tools for jewelry making you’ll need to get started.

Best Tools For Jewelry Making


  • Chain Nose Pliers


This is critical as a jewelry making tool, especially if you’ll be working with beads. Chain nose clippers can be quite useful when you need to open and close sterling silver jump rings, for example. When opening and closing a jump ring, they allow you to twist them open and closed rather than pulling the ends apart. This work hardens them and prevents them from getting misshapen.

If you’ll be beading, consider purchasing pliers with spring handles. These types of handles are much easier on your wrists as they allow the pliers to spring open on their own whenever you close them.Best Tools For Jewelry Making

If you opt for a kit of pliers, you can use the chain nose pliers along with the flat nose to open and close jump rings without having to purchase a second set of chain nose pliers.


  • Cutters


Making jewelry requires cutting tight places. For instance, when snipping off extra wire after crimping the end. When beading, for example, the extra wire can be snuggled up between the crimp and the last bead, which is a very small space to work in. If you purchase a plier kit, side cutters can come in quite handy, but having ultra-fine point nippers is also a good idea.


  • Crimping Pliers


When it comes to jewelry making, crimping pliers are a must-have tool. They are used to close crimps at the end of necklaces to secure beads or other pendants on stringing wire. They’re also simple and easy to use and some come with interchangeable dies to meet your needs.


  • Jeweler’s Glue


Jeweler’s glue can be used to secure those knots that tend to unravel over time. The extra support from just a drop of glue or adhesive can keep the knots secure for up to a year or longer. It’s a great purchase as a single tube or bottle can go a long way.


  • Stringing Wire


This is not exactly a tool but it’s equally as important as any other tool used in jewelry making. Stringing wire is an essential component when planning out your jewelry project. There are plenty of options in the market but the most important factors to consider are the strength and diameter of the wire. The diameter is crucial because you need beading wire that will fit through the beads or any other additions to your jewelry. Strength is critical because you need wire that’s not only durable but also able to handle the weight of the beads, for example.

Bottom Line

With some of the best tools for jewelry making, you can start making your own jewelry today! Enjoy the experience and within no time you’ll get the hang of it.

Can You Solder Sterling Silver

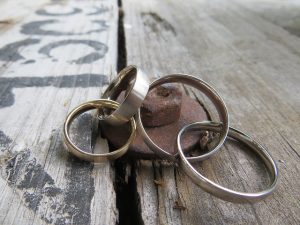
Sterling silver rings and necklaces can last practically forever if properly cared for. However, silver jewelry can become so much more if the owner knows how to adjust and improve the piece. Can you solder sterling silver? If you have the knowledge of doing so, you can solder sterling silver to improve, fix or adjust it to your needs and desires.

Can You Solder Sterling Silver

Soldering is essentially using heat (a torch) to fuse together two metal objects with a piece of solder in between the two. This can actually be done with many other metals that is typically used for accessories other than sterling silver such as copper and gold. Soldering silver or other metals at home can be quite dangerous as well as difficult. Before starting this task, the area should be properly prepared and the correct attire needs to be worn.

The Right Materials

Charcoal Soldering Block or Kiln Brick

The right surface to doing anything that include metal and heat is either a charcoal soldering block or kiln block, However, the kiln block is second recommendation in the case that a charcoal block in not available. Charcoal deflects heat and creates a high temperature environment that silver needs to melt. Some people have recommended other materials for home DIY projects that include magnesia block, ceramic or solderite board.

Torch

A butane torch or small oxy-acetylene is necessary when soldering sterling silver. A small butane torch is the best option as it heats at a lower heat and is meant for a smaller job that requires more precision.

FluxCan You Solder Sterling Silver

A cleaning agent is needed for the two pieces being conjoined before applying heat, and that cleaning agent is called flux. Flux removes any oxidation before soldering to prevent beads or bubbles from forming. Most people apply this with a small brush or a cloth. Flux is also available in spray form as well.

Steel Wool and Cloth

While flux cleans right before the heat is applied, cleaning the sterling silver with steel wool and cloth will take off any contaminants from heavily handled pieces.

Tweezers

It goes without saying that touching hot metal is not safe and can cause horrible burns. Soldering tweezers or small copper tongs will be a great assistant in this task to avoid burning your fingers and hands. Copper tongs are best when handling anything anything that may conduct high heat.

Proper Clothing

Protection is key. Keep yourself safe with fitted clothing, closed toed shoes, a canvas apron or denim apron and goggles to protect your eyes. Goggles are essential in protecting your eyes from hot metal splatter, especially since you will need to be looking very close to see what you’re doing. If you have long hair, be sure that it is pulled back into a ponytail or bun. Long loose sleeves need to rolled up or pulled back.

Soldering Wire or Sheets

Solder is the material that is added between the joints to conjoin them. It is an alloy made up of silver and other metals, which melts at a lower temperature than sterling silver. Therefore, when heat is applied to it, soldering silver acts as a metal glue. When beginning, always start with soft solder as it is easiest to work with.

Finishing Touches

At the end of your soldering task, you will need to clean and cool your new creation. Have beside you a cup, bowl or bucket of tap water and a cooling surface area. The cooling area can be on the same heat resistant block that is on your work area or a pumice stone.

How to Solder Sterling Silver

  1. Open windows to create ventilation and cool the room.
  2. Conduct initial cleaning of the sterling silver with steel wool and a cleaning cloth. Do this away from your soldering area and clean away metal dust when finished.
  3. Apply flux with brush or cloth on joint area where heat will be applied.
  4. Set up silver pieces on the block as you want them to be soldered together as close together as possible.
  5. With your tweezers, take a piece of solder on the crack where the pieces will be joined. Do not put too many, as the solder metal will spread and fill up the gaps.
  6. Hold the torch away from the jewelry and adjust the flame, then start by holding the torch about 4 inches away from the silver pieces. Don’t apply the heat directly to solder and focus more on the sterling silver. When the silver gets hot enough it will melt the solder fast and the soldering piece will melt into the spaces it needs to fill.
  7. Let the new jewelry cool off for about a minute and then dip it into your cup or bowl of water.
  8. Let dry and pat dry with a cleaning cloth.

In Conclusion

Can you solder sterling silver? Similar to the process of removing super glue, you need to ensure you have what you need to solder silver. As long as you have the right materials and set up your work area properly, you can solder any of your sterling silver accessories and possessions from your own home.